BlueBubbles
BlueBubbles turns a Mac into an iMessage server. StarAgent connects to it so your phone agent can send and receive iMessages on your behalf.
Requirements
- A Mac (Intel or Apple Silicon) signed into iMessage, left on and connected to the internet
- The BlueBubbles Server app
- A StarAgent account with a phone number configured
Setup
StarAgent gives your BlueBubbles server a permanent URL so you never have to copy and paste tunnel URLs again.
- 1Download and install the latest BlueBubbles server DMG on your Mac.
- 2Open BlueBubbles and grant the permissions it asks for (Full Disk Access, Accessibility, etc.).
- 3Skip the Google Firebase step when prompted. It is not needed for StarAgent.
- 4On the Configuration screen, set a server password. For the proxy service, select Dynamic DNS / Custom URL from the dropdown and leave the address blank for now.
- 5Skip the Private API setup and SIP Unlock steps if prompted. These are not needed for StarAgent.
- 6In StarAgent Setup, scroll to the BlueBubbles section and flip the toggle on. StarAgent will automatically provision a permanent URL for your server (something like
bb-crimson-brave-dolphin.staragent.io). - 7Copy the URL shown in Step 1 and paste it into the BlueBubbles Dynamic DNS / Custom URL address field.
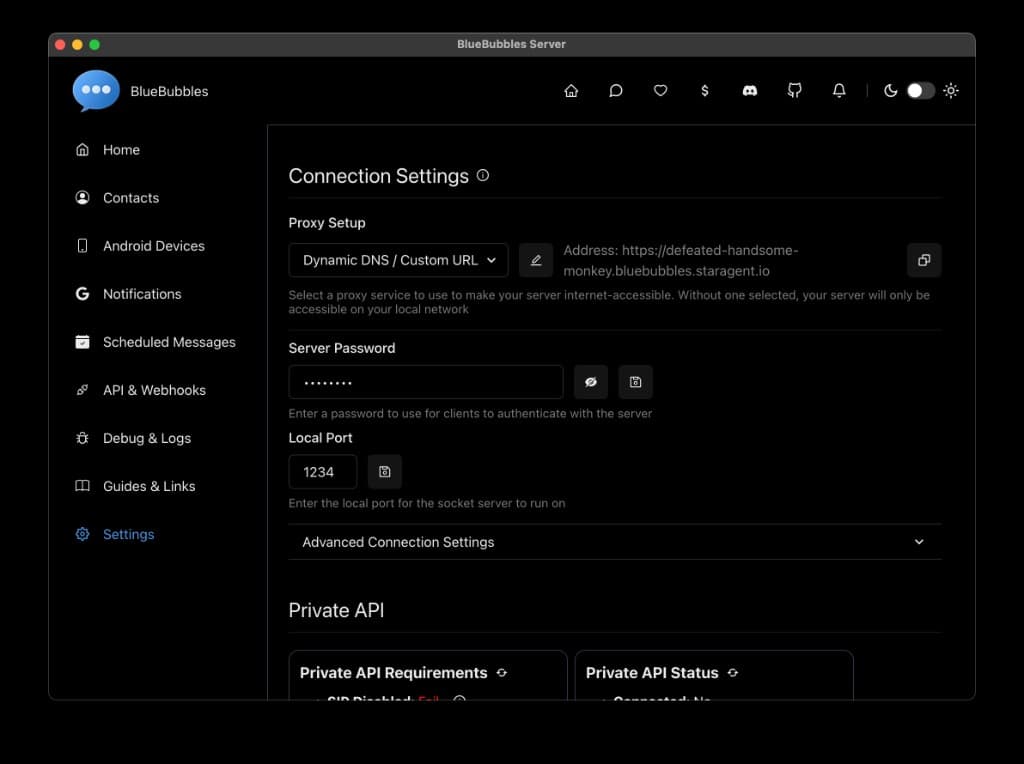
In BlueBubbles, go to Settings > Connection Settings and select "Dynamic DNS / Custom URL" from the Proxy Setup dropdown. Paste your StarAgent URL in the address field.
- 8Copy the install command from Step 2 in StarAgent Setup. This installs cloudflared, an open-source connector by Cloudflare that securely links your Mac to your StarAgent URL. Open Terminal on your Mac and follow these steps.
- a.Open Terminal (press Cmd + Space, type "Terminal", and press Enter)
- b.Paste the command (Cmd + V) and press Enter
- c.When prompted for a password, type your Mac login password and press Enter. The password won't appear as you type. This is normal.
curl -sL https://staragent.io/install-cloudflared | bash -s -- YOUR_TOKENThis installs a small connector that links your Mac to your StarAgent URL. It starts automatically on boot. You only need to run this once.
- 9In Step 3, enter your BlueBubbles server password and click Test Connection. If it connects, you're done.
bb-*.staragent.io URL stays the same across restarts, reboots, and network changes. Nothing to update. To disconnect, flip the toggle off in Setup.How the connector works
The install command sets up Cloudflare Tunnel (cloudflared) as a background service on your Mac. It makes an outbound connection from your Mac to Cloudflare's network and routes traffic from your assigned subdomain to the BlueBubbles server running on localhost:1234.
- No ports need to be opened on your router
- Traffic is encrypted end-to-end through Cloudflare
- The connector starts automatically when your Mac boots
- Your tunnel token is unique to your account and cannot be used by anyone else
Uninstalling the connector
To remove the connector from your Mac, run:
You can also flip the BlueBubbles toggle off in StarAgent Setup, which will revoke the tunnel.
Troubleshooting
- Connection test fails. Make sure the BlueBubbles server is running on your Mac and that the connector is active. Run
sudo launchctl list | grep cloudflaredto check. - Messages not sending. Confirm the Mac is signed into iMessage (open Messages.app and verify). Also check that the Mac has not gone to sleep.
- Connector not starting after reboot. Re-run the install command from step 8. It will re-register the service.